CoolTool Blog

6-Step Tutorial On Video Testing With NeuroLab
One of the CoolTool NeuroLab options is video testing with the help of eye tracking, emotion measurement, and EEG which helps to identify corresponding areas of interest as well as analyze which emotions the clip provokes. Let's see how to test your video with NeuroLab using this simple 6-step tutorial.
Step 1. Create an account
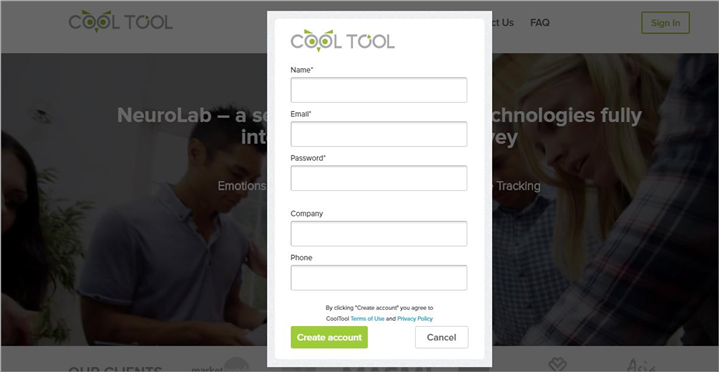
In case you don’t have an account at CoolTool you will have to register one in order to access all the system tools. The registration process will literary take one minute. Simply go to CoolTool website and select NeuroLab in the menu bar. Click on «Free account» icon and enter your name, e-mail, and password (Pic 1). Then, the system will generate a message with a confirmation link that will be immediately sent to your e-mail. Click on the link in the e-mail and that’s it. You can now start a new project.
Pic 1
Step 2. Upload a video

After you have logged in, click on the «create new project» (Pic 2) button and name the project. After that, you will be able to access the menu displaying all the functions of Neurolab (Pic 3). In this tutorial, we won’t dwell on all the functions but we’ll consider only those related to video testing. In order to launch the test, press the «video» button in the «Neurolab test section». Then upload the video which you want to test.
Pic 2

Pic 3

When the video has uploaded, choose the «emotions measurement» option (Pic 4). «Eye-tracking» will be selected by default (note, you should have the special hardware for eye tracking). You can also choose an «EEG measurement» option to measure the brain activity of your respondents, in case you have special hardware.
Pic 4

Step 3. Install the NeuroLab application
After the video is uploaded you can customize the design of the survey by choosing one of the templates in the «Customize design» section. As we don’t have any surveys for this tutorial, we just skip this step and pass to the third section «Collect Responses» (Pic 5). Should you want to learn more about creation and adjustment of surveys you can download the PDF-tutorial «How to Create Questionnaires» by clicking on light bulb icon in the upper right corner as shown in Pic 6.
Pic 5

Pic 6

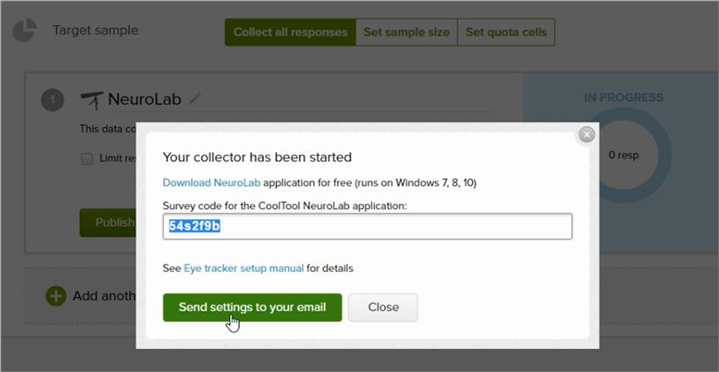
Here you can adjust the sample size of your survey as well as set target groups for the survey, etc. What you need to do in order to launch the process of video analysis is to press «Start». In the popped-up window, a survey code will appear (Pic 7) which you need to copy and paste in order to proceed further. You can also send this code to your e-mail, so you won’t forget it. You also have to download and launch the NeuroLab application following the hyperlink in the popped-up window. Once you’ve downloaded the application you can run it automatically. The installation process is simple and takes around 3-5 minutes.
Pic 7
4. Start a video test

After opening the Neurolab app, paste the code you’ve just saved and press «upload» (Pic 8).
Pic 8

Once the video is uploaded you can run the test. Before the testing process will start, your respondents will have to spend half a minute for the calibration process. In order to complete it, they will have to follow the gray and red dot movement all over the screen (Pic 9). After the calibration process is completed the video will start and the program will record all the changes of emotions it detects during the screening of the video.
Pic 9

Step 5. Analyze results
Once the video screening is completed the program will automatically launch the synchronization process. When the process is completed go to the «process data» section where you will find the so-called «raw data» which you can export as XLS or SPSS documents. In order to see the results of the testing, click on the icon «Neurolab video» (Pic 10) located in the left upper corner under the «Neurolab recordings» section and then press «play».
Pic 10

After you press «play», a video with different data will appear as shown in Pic 11. Here you’ll see the graphic visualization of how the emotions of the respondent changed during the screening of the video. The green eye-sign will show how their gaze moved while they were watching a clip.
Pic 11

Step 6. Generation of reports
After the test is completed and the data is collected, you can generate a report with just a couple of clicks. Go to the «Analyze reports» section and click on «New report». A window will appear (Pic 12), with several report samples, including one for analysis of the area of interests, a heat map and a sample for analyzing the change of emotions.
Pic 12

As you can see the system is self-explanatory and quite easy to use. By following a simple algorithm, you can collect valuable data about customers and get insights into their behavior and decision making patterns. In case you need more information on how to use our NeuroLab tool feel free to Request Demo and we’ll send you a comprehensive video on how to use our system as effectively as possible.
